
Most LinkedIn profiles leave traffic on the table. By default, your website link shows up as a generic "Blog" or "Website" label that most visitors ignore. With a small tweak, you can replace that with a custom title that actually gets clicks.
Here's exactly how to do it.
- Add your website link via "Contact info" → edit contact info button → "Add website"
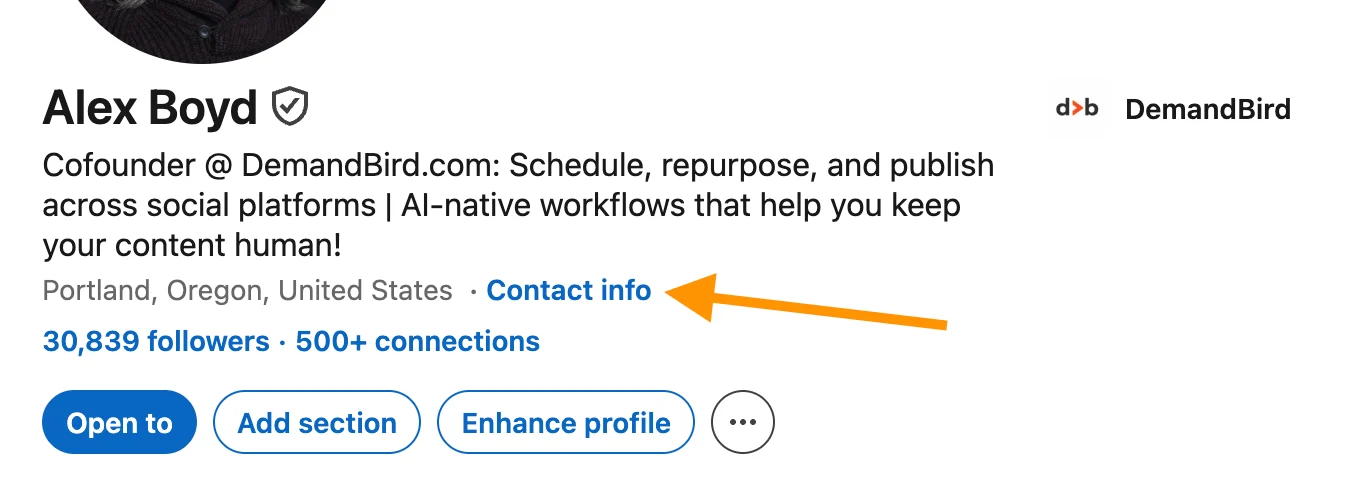
Step 1: Go to "Contact Info"
From the header of your LinkedIn profile, click on the Contact info link. Then click the pencil (edit) icon to open your contact details.
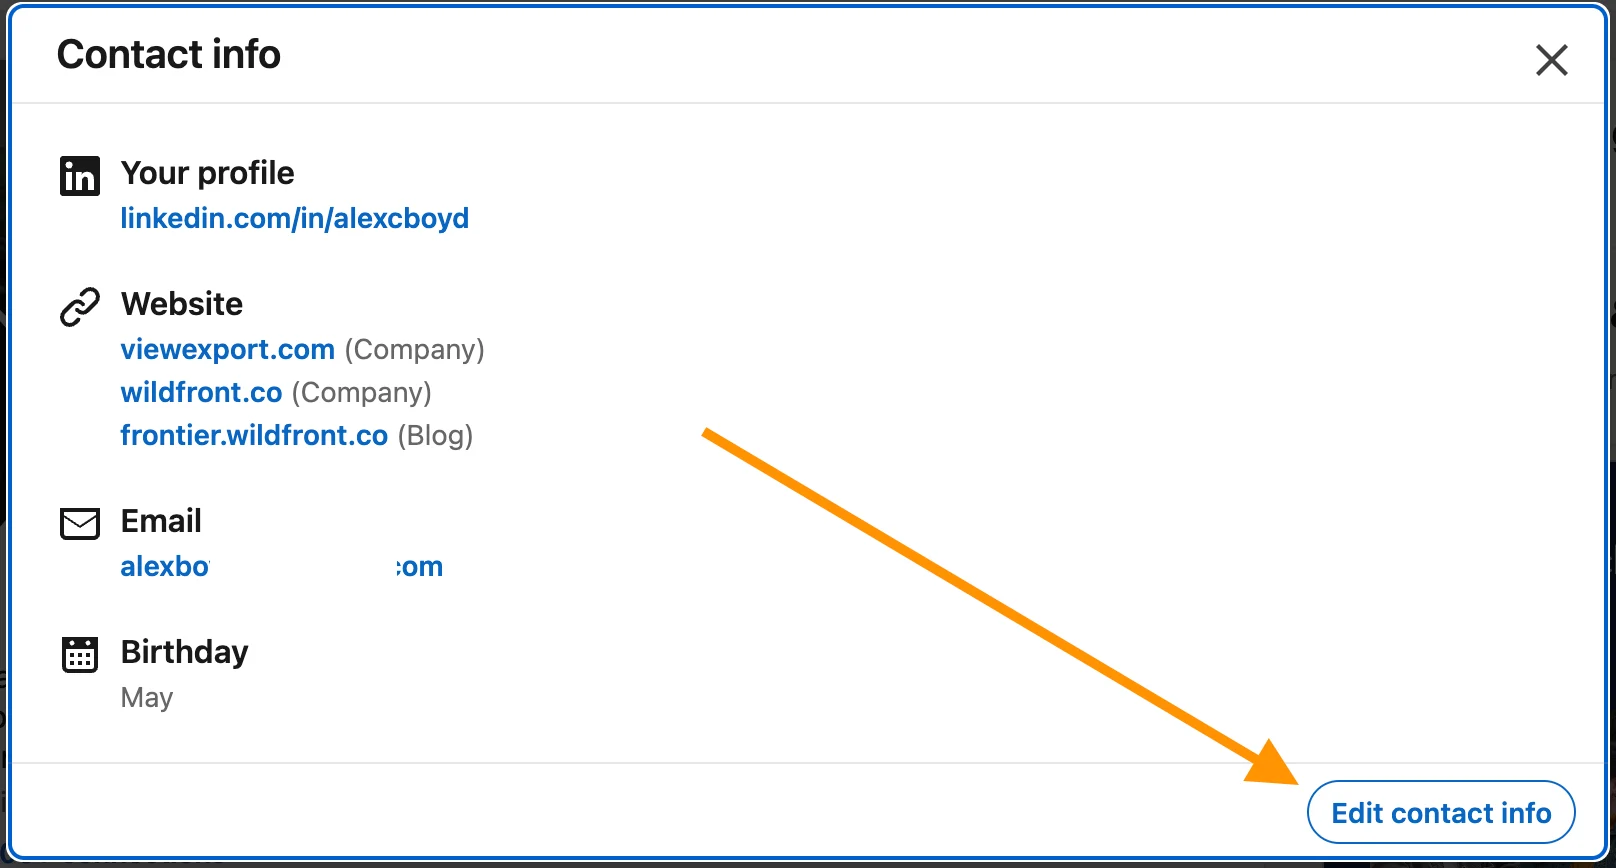
Step 2: Click "Edit Contact Info"
Inside the contact info panel, click the Edit contact info button in the bottom-right corner. That opens the full edit view where you can add or update your website links.
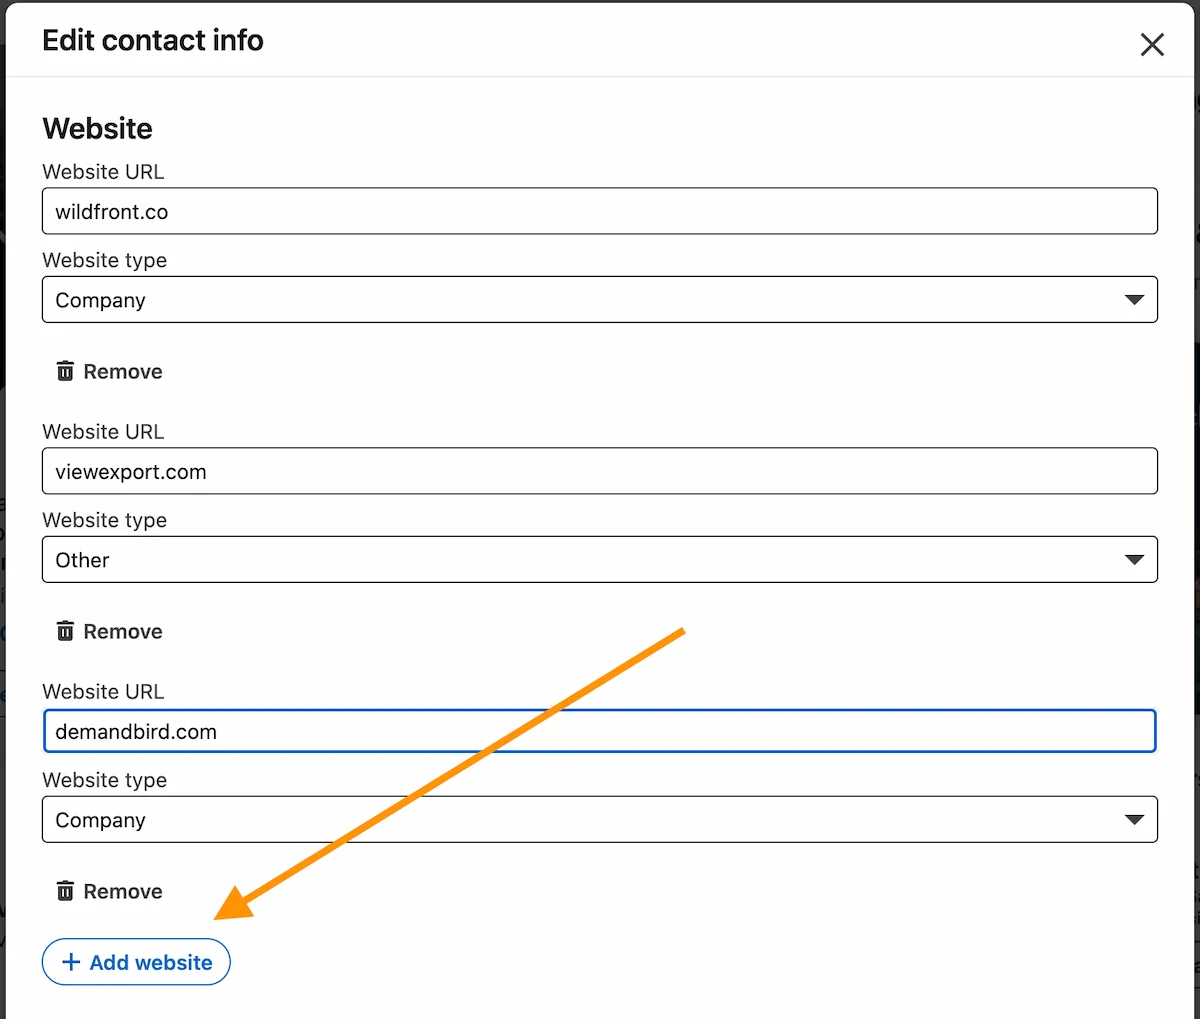
Step 3: Choose "Add Website"
Scroll down to the website section and click Add website, then enter your URL and select the website type.
That's it. A two-minute change that can meaningfully increase clicks from people already looking at your profile. Want to see exactly how it looks from a visitor's perspective? Check out how to view your LinkedIn profile as others see it.
From here: get more impressions on LinkedIn, write a stronger LinkedIn summary (I cover where to place your website link in the first few lines), or read the full guide to optimizing your LinkedIn profile for B2B growth.
Understand what's working on your LinkedIn
DemandBird helps B2B teams grow their social media presence without the guesswork.
Start Free Trial